Blender矩阵修改器怎么使用?Blender矩阵修改器使用方法
今天小编为大家带来了Blender矩阵修改器使...
今天小编为大家带来了Blender矩阵修改器使用方法,想知道怎么做的小伙伴来看看接下来的这篇文章吧,相信一定会帮到你们的。
Blender矩阵修改器怎么使用?Blender矩阵修改器使用方法
1、首先进入Blender创建常规界面后,在视图的右边可以找到修改器属性。

2、然后点击添加修改器。
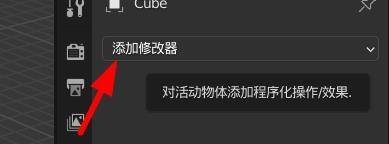
3、在修改器列表中选择矩阵。

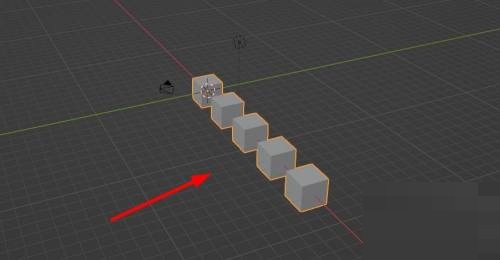
4、接着一般我们都是设定固定数量和在某个方向上的间隔距离。

5、设置好后得到图中效果。
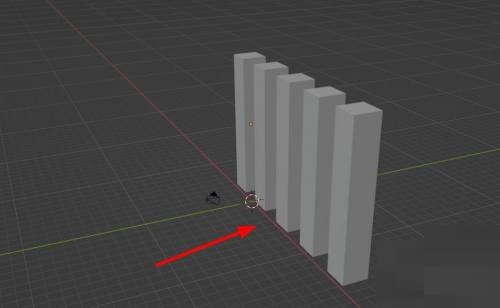
6、最后这时候修改最原始的物体,其他物体一起改变。
以上这篇文章就是Blender矩阵修改器使用方法,更多教程尽在本站。


